In this article, we are creating a Telegram Auto Reply Bot using Python and Flask. Here is the Step by Step Instructions.
Table of Contents
Step 1: Install the required Python packages first by using the following command.
pip install flask
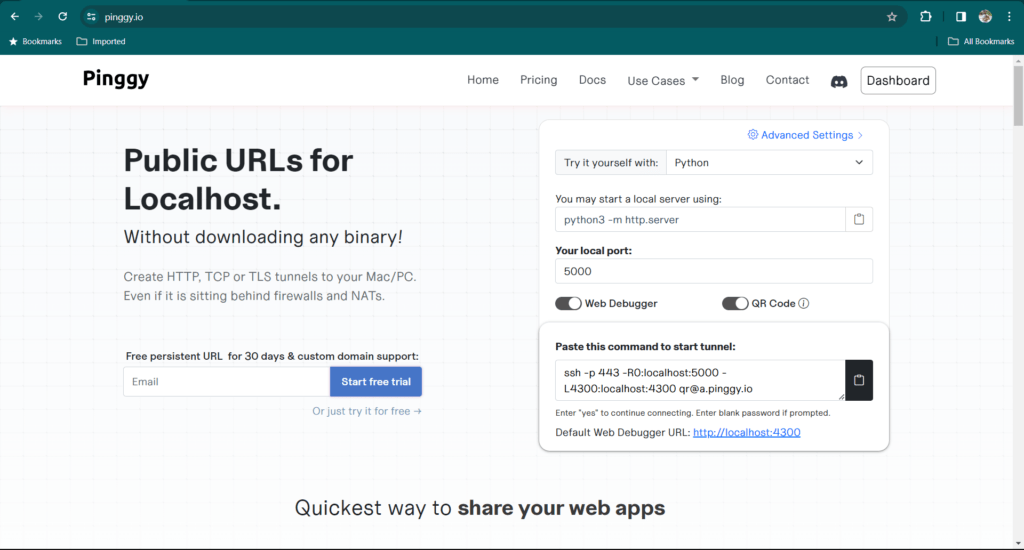
pip install requestsStep 2: Create a Tunnel Using https://pinggy.io/
- We will need to create a tunnel. This tunnel will be used by Telegram to send messages to our Flask program. So you can open this URL on the browser https://pinggy.io/
- Copy the command shown in the pinggy.io web page.
Step 3: Run Tunnel commands on the command prompt.
- Replace localhost with 127.0.0.1 and run it on the command terminal on Windows or Unix/Linux.
- It should create http and https tunnels as shown in the screenshot.
- We will be using https tunnel in the next step
ssh -p 443 -R0:127.0.0.1:5000 -L4300:127.0.0.1:4300 [email protected]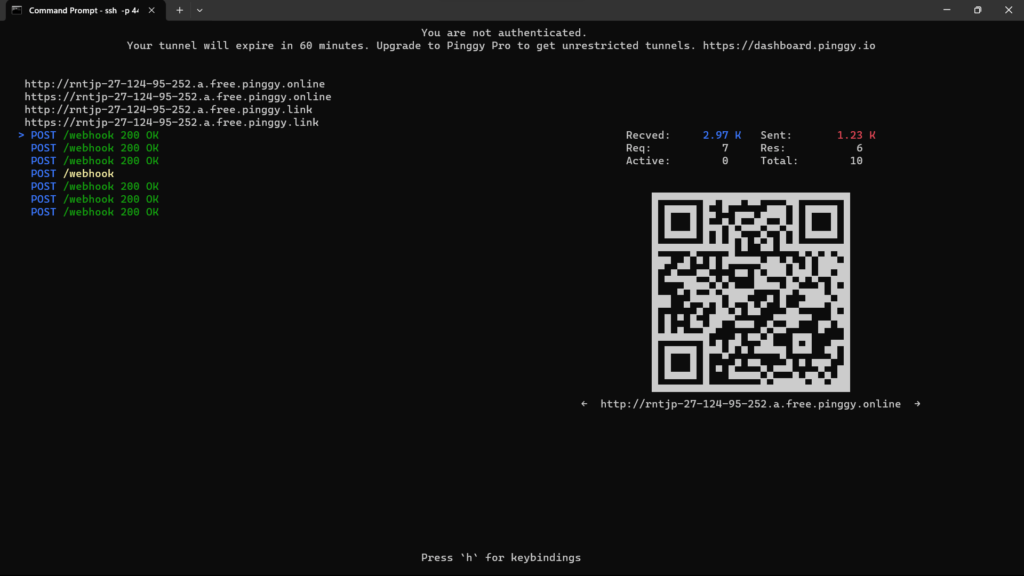
Step 4: Open Visual Studio Code and paste the following program in a file called telegram_auto_reply.py
# File name is telegram_auto_reply.py
from flask import Flask, request, jsonify
import requests

# Your bot token
bot_token = "6660468220:AAGg0FW0YzmhaiHJKUMXm3RKljgb-BiLESM"

# URL of your webhook endpoint
webhook_url = "https://rntjp-27-124-95-252.a.free.pinggy.online/webhook"  # Replace this with your actual webhook URL

# Set webhook
set_webhook_url = f"https://api.telegram.org/bot{bot_token}/setWebhook?url={webhook_url}"
response = requests.post(set_webhook_url)
print(response.json())


app = Flask(__name__)

@app.route('/webhook', methods=['POST'])
def webhook():
    data = request.json
    if 'message' in data:
        chat_id = data['message']['chat']['id']
        message_id = data['message']['message_id']
        message_text = data['message']['text']
        response_text = process_message(message_text)
        send_message(chat_id, response_text, message_id)
    return jsonify({'status': 'ok'})


def process_message(message):
    message = "hello"
    return f"{message}"

def send_message(chat_id, text, reply_to_message_id=None):
    # API endpoint for sending messages
    url = f"https://api.telegram.org/bot{bot_token}/sendMessage"

    # Payload to send in the request
    payload = {
        "chat_id": chat_id,
        "text": text,
        "reply_to_message_id": reply_to_message_id  # Optional: ID of the message to reply to
    }

    # Send the POST request
    response = requests.post(url, json=payload)

    # Check if the request was successful
    if response.status_code == 200:
        print(f"Message sent to chat ID {chat_id}: {text}")
    else:
        print(f"Failed to send message to chat ID {chat_id}")


if __name__ == '__main__':
    app.run(port=5000)
Step 5: Update Bot Token and Webhook URL
In the program, you will need to update the bot_token and webhook_url
Step 6: Send “Hi” to your Telegram Bot
Now you should be able to send a message to your telegram bot and it’s going to reply with “Hello”
Conclusion: Telegram Auto Reply Bot
In this article, we learned to create an Auto Telegram Reply bot with the help of Flask. Of course, this program can be further enhanced to reply based on the message it receives, we are going to see that in our next article.
This concludes our article Telegram Auto Reply Bot here, See you in the next Article.